Packaging code
In this page, we describe how to package your Spark code so that it can be run on Data Mechanics.
There are two options available:
- building a Docker image containing your source code and pushing it to a Docker registry
- uploading your source code to an object storage
Important Note
You need to call spark.stop() at the end of your application code, where spark can be your Spark session or Spark context. Otherwise your application may keep running indefinitely.
Add your code to a Docker image
Using Docker images makes dependency management easy, particularly for Python workloads. They let you have tight control over your environment: you can run the same Docker image locally during development and on Data Mechanics for production.
In this section, we'll learn how to build a Docker image from your code, set up a container registry, and push the Docker image to the container registry.
Build a Docker image and run it locally
Make sure you have Docker installed on your machine.
For compatibility reasons, you must use one of our published Docker images as a base, then add your dependencies on top. Building an entirely custom Docker images is not supported.
Data Mechanics Docker images are freely available at https://gcr.io/datamechanics/spark. This page tells you all about them.
- Python
- Java & Scala
For this example Python project, we'll use Data Mechanics main Docker image spark:platform with Python support and connectors to popular data sources included: gcr.io/datamechanics/spark:platform-3.1.1-latest.
We'll assume your project directory has the following structure:
- a main python file e.g.
main.py - a
requirements.txtfile specifying project dependencies - a global python package named
srccontaining all project sources. This package can contain modules and packages and does not require source files to be flattened. Becausesrcis a python package it must contain a__init__.pyfile.
Add a file called Dockerfile to the project directory with the following content:
Build the Docker image by running this command in the project directory:
Run it locally with
where <args> are the arguments to be passed to the main script main.py.
The option -e SPARK_LOCAL_IP=127.0.0.1 is required for local runs only.
Set up a Docker registry and push your image
- AWS
- GCP
- Azure
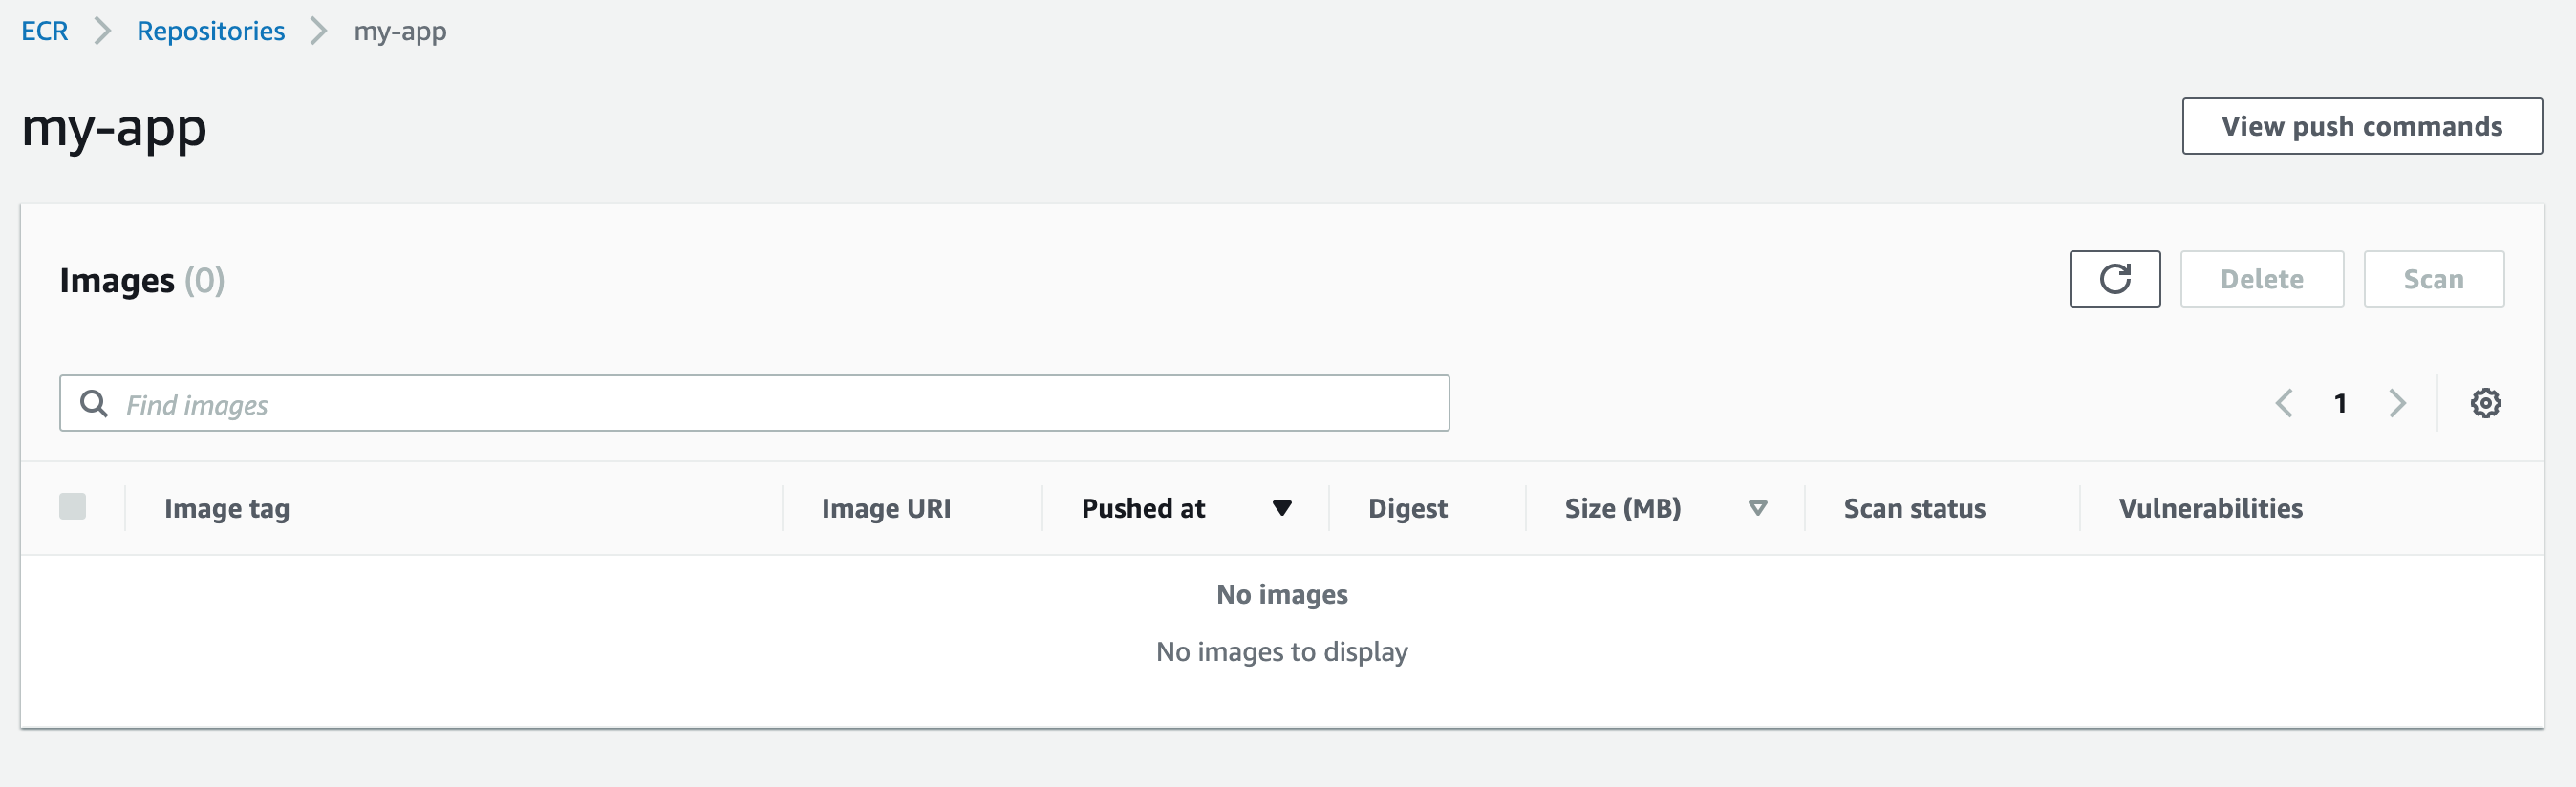
The simplest option on AWS is to use the Elastic Container Registry (ECR) of the account where the Data Mechanics platform is deployed. This way, the Spark pods can pull the Docker images without needing extra permissions.
First, navigate to the ECR console and create a repository with name my-app in the account where the Data Mechanics is deployed.
Make sure to create it in the same region as the Data Mechanics cluster to avoid transfer costs.
Please refer to the AWS docs in case of issue.
Then, generate a temporary token so that Docker can access ECR for 12 hours with the following:
This complex command can be found in the AWS console by clicking the "View push commands" button.
You can now re-tag the Docker image we built above and push it to the ECR repository:
Please refer to the AWS documentation about ECR in case of issue.
Run your image on Data Mechanics
The Spark application can now be run on Data Mechanics:
- GCP
- AWS
- Azure
- Python
- Java & Scala
Host your code on an object storage
In this section, we'll learn how to package your code, upload it to an object storage, and make it accessible to the Data Mechanics platform.
If possible, prefer building a Docker image containing your source code. It is more robust and more convenient, especially for Python.
Python
Project structure
In order to run on your cluster, your Spark application project directory must fit the following structure:
- a main python file e.g.
main.py - a
requirements.txtfile specifying project dependencies - a global python package named
srccontaining all project sources. This package can contain modules and packages and does not require source files to be flattened. Becausesrcis a python package it must contain a__init__.pyfile.
Package python libraries
Run the following command at the root of your project, where the requirements.txt file is located.
All your dependencies are now zipped into a libs.zip file.
Package project source files
Zip your project source files from the global package src. This package will be consumed by your Spark application main file using python imports such as:
import src.your_modulefrom src.your_package.your_module import your_object- ...
Zip the src global package:
All your sources modules/packages are now zipped into a src.zip file.
Upload project files
Upload prepared files to your cloud storage:
- GCP
- AWS
- Azure
Run the application
All required files are uploaded in your cloud storage. The Spark application can now be started:
- GCP
- AWS
- Azure
Note that Data Mechanics automatically chooses a Spark image for your app based on the sparkVersion.
For AWS, if you are referencing s3 for main application file or Dockerfile, you must use the file format s3a, otherwise spark will throw an exception.
You can access the dashboard at https://<your-cluster-url>/dashboard/ in order to monitor your Spark application execution.
Java & Scala
The procedure is simpler for JVM-based languages, as Spark has been designed with these in mind.
Once your application is compiled, upload it to your cloud storage:
- GCP
- AWS
- Azure
Reference your JAR (and its dependencies if it has any) in the configuration of your Spark application:
- GCP
- AWS
- Azure
Note that Data Mechanics automatically chooses a Spark image for your app based on the sparkVersion.
For AWS, if you are referencing s3 for main application file or Dockerfile, you must use the file format s3a, otherwise spark will throw an exception.
If you need to import a dependency directly from a repository like Maven, the deps->jars list accepts URLs, like: